
Django Site Administration Guide
The following document is a system administrators manual that gives information on how to configure and manage the TroFMIS. The backend of the system is built on django framework and therefore features the general characteristics of Django admin settings. From the admin panel, the system administrators can manage dataset, users, and system resources, thus ensuring that the computing resources are well utilized while still maintaining a high level of data security and integrity. The figure below shows the django admin home page, when logged in. To log in to the Django admin framewok, please use the authorised TroFMIS email and password that were provided.

The components of the django admin are described in details in the next sections.
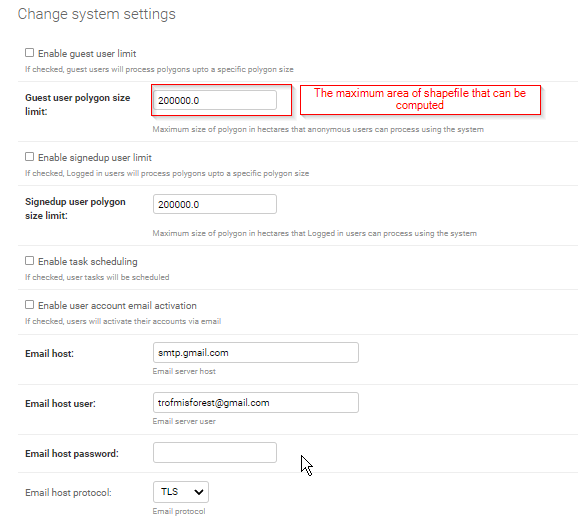
System Settings
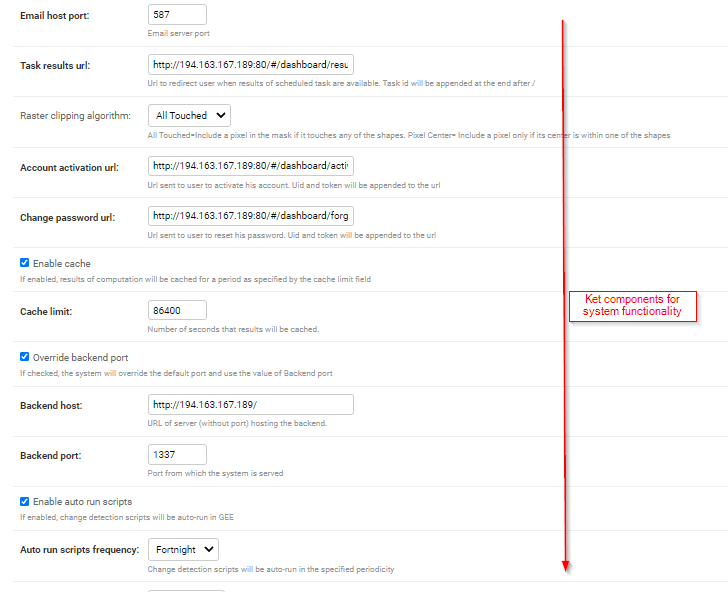
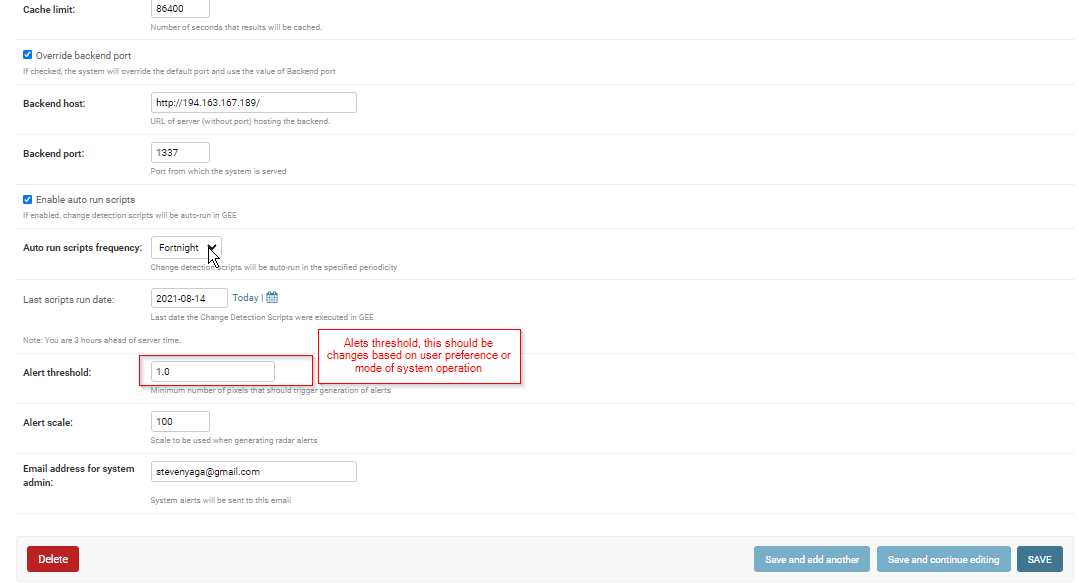
System settings can be accessed by going to System Settings. From here you can set several variables that are key to system resources management. One of the variables you can configure from here is the maximum size of a polygon that can be processed by the system on the fly. The system settings, however, can only be configured once during system development phase, and the system will reuse the standards set to compute and generate results. The system setting compoenents is illustrated below.
TroFMIS Models
Managing Administartive Boundaries
TroFNMIS has both the level 0 (Country) and level 1 boundary (Forest boundaries). For the system continuity, the administrative boundaries will require updating. The system admin needs to upload the admin boundaries in shapefile format, incase of any update and system advancement.
To update the admin level 1 click the django link as shown in the figure below.
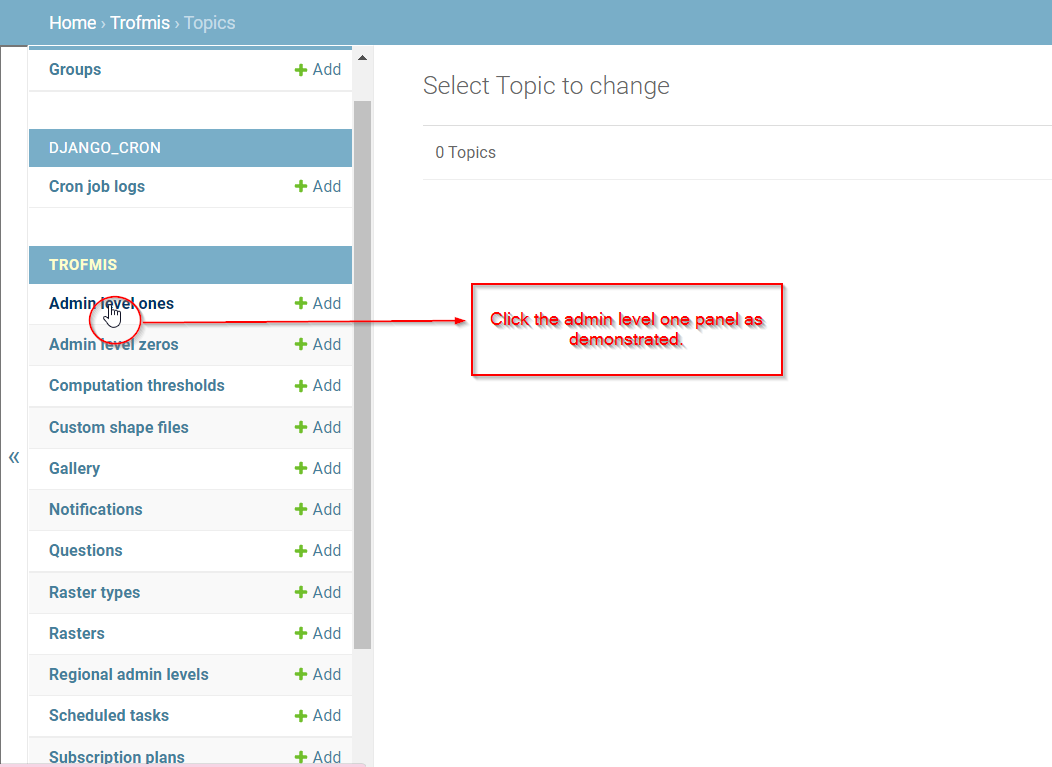
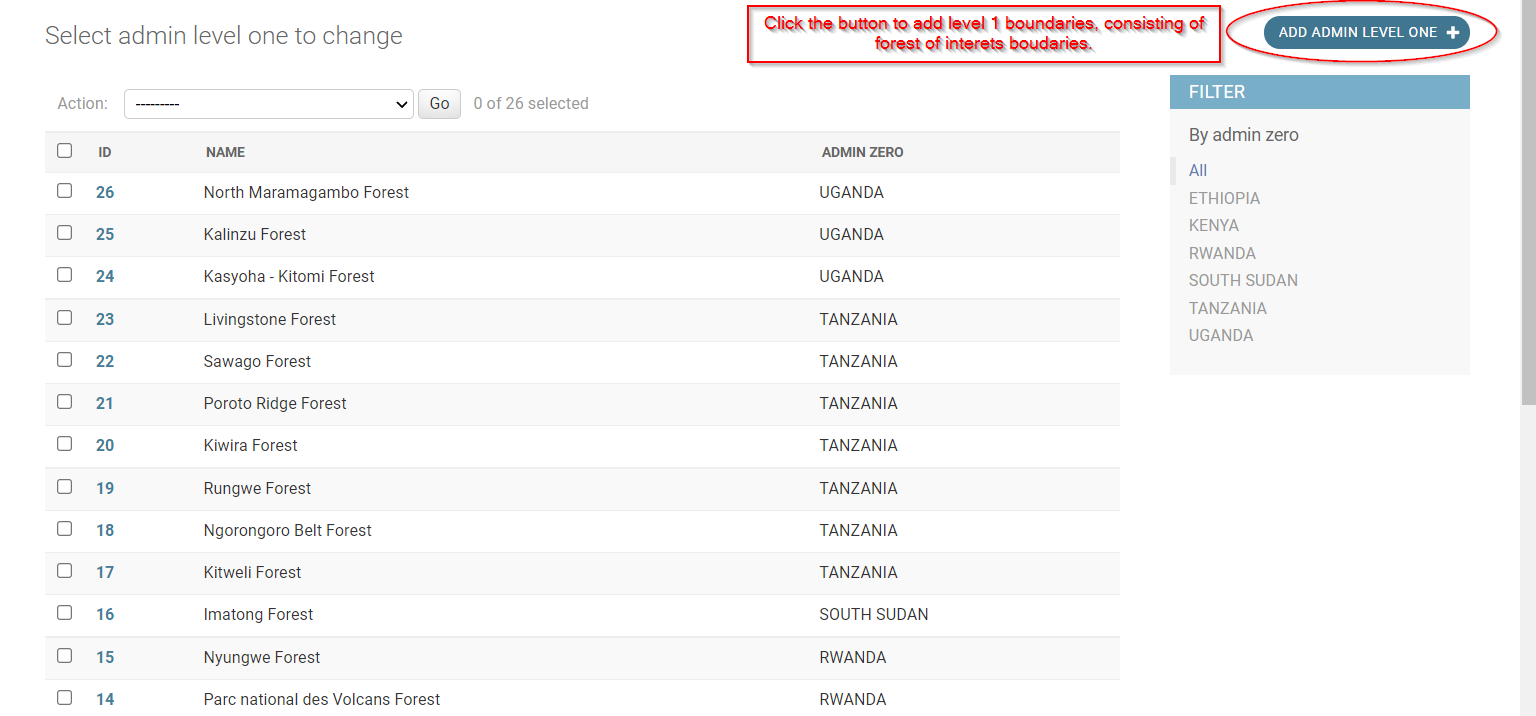
The link leads to a panel that allows the admin to add the level 1 boundaries, of a specific forest as shown in the figure below.
When loading the admin level 1 boundary, remebner to follow the steps as shown in the figure below. The mandatory steps include: Giving the admin boundary a name, Associate the boundary with country of origin, Save the file based on the next actions.

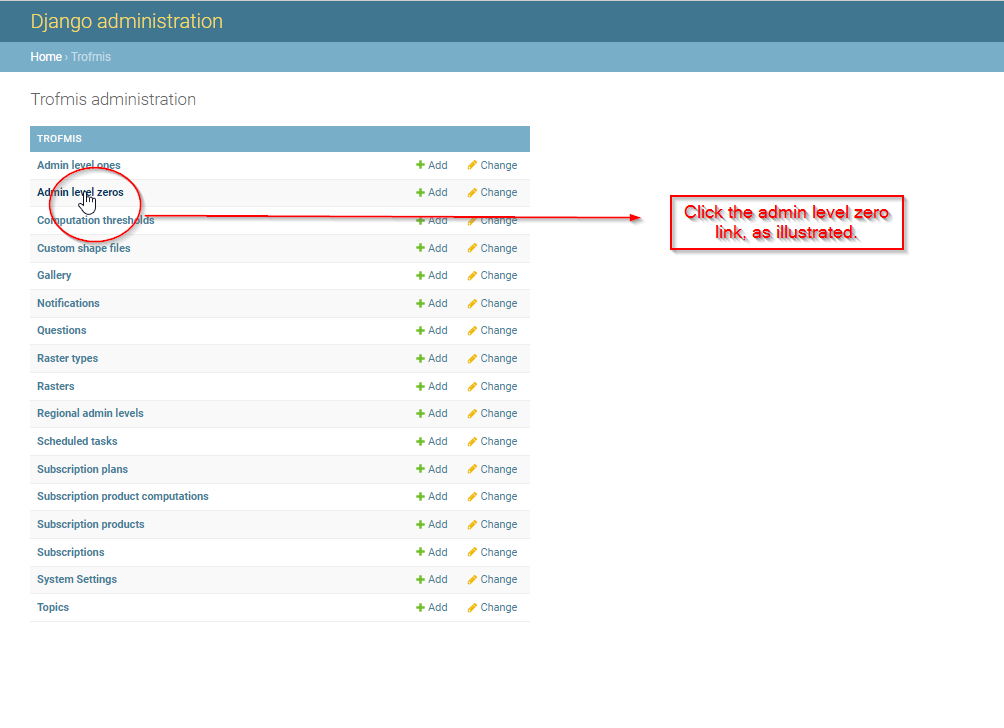
To update the admin level 0 click the django link as shown in the figure below.
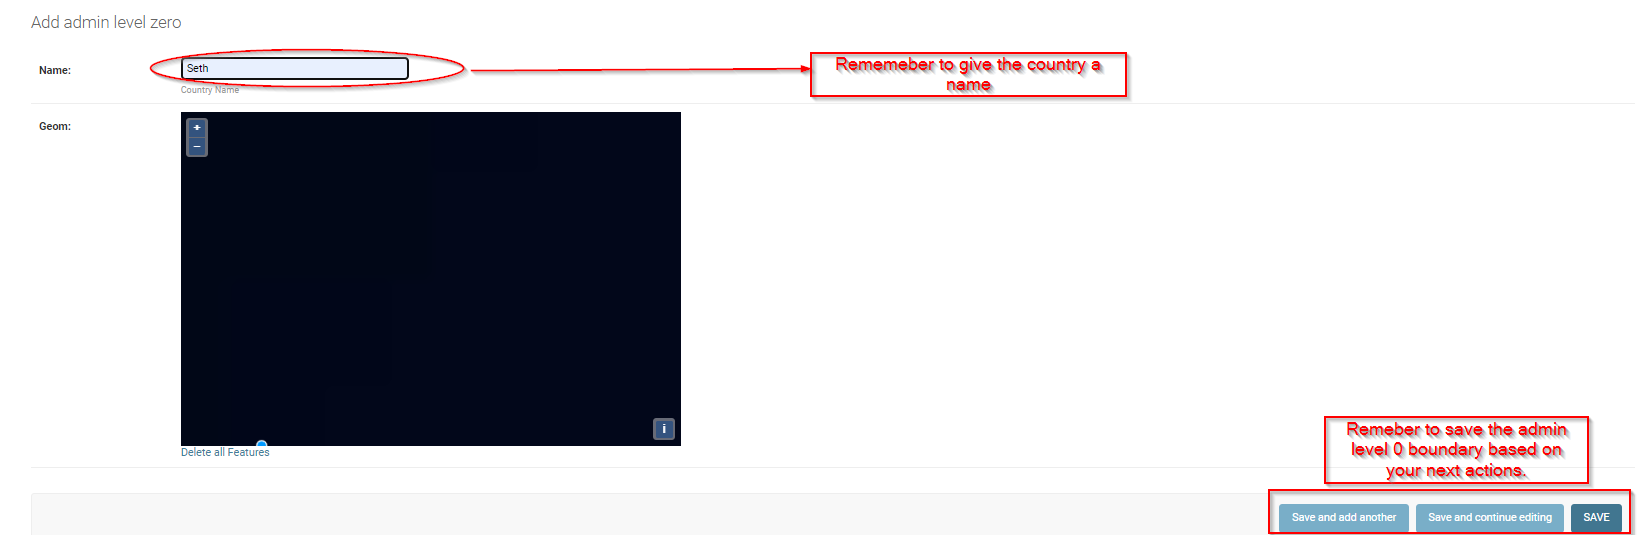
The link leads to a panel that allows the admin to add the level 0 boundaries, of a specific country as shown in the figure below.

Remeber to give a name to the country boundary, as you save based on you next actions.
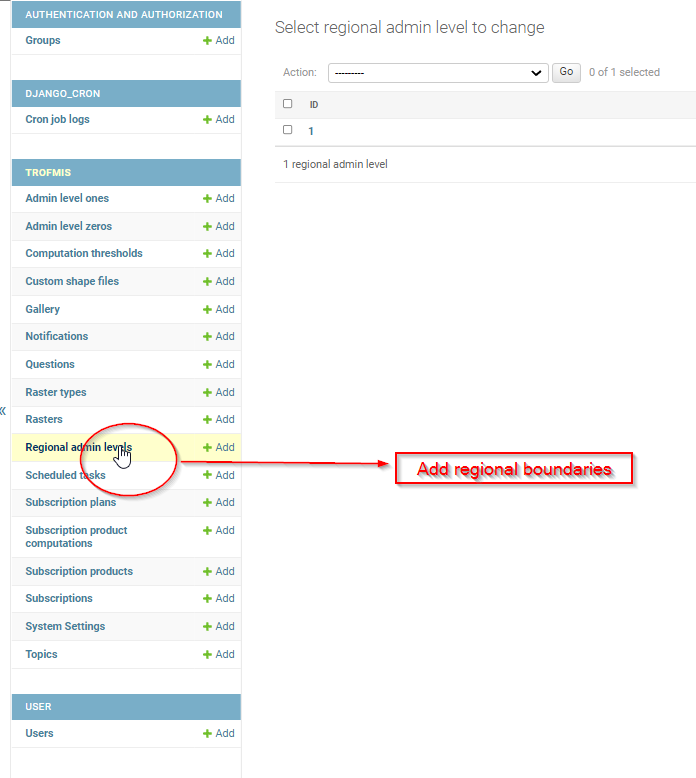
To add the regional shapefile, follow the steps as shown above in both admin level boundary, however, accessing through the Regional Boundary link.
Managing Administartive Boundaries